When you’re asked to create a form, do you ask yourself these questions: Where do I put that information? What do I need to add as information? Why do I need to add to this information? What do I do with this information?
If all those questions come up often when you create or use forms, it could be that the fields in place aren’t precise enough or even relevant. It often happens that on the first day that you use the solution, some fields appear to be important, but as your business evolves, they become obsolete. It’s important to reevaluate the relevancy of those fields and the way you create your forms.
If you need help understanding the fields in Microsoft Dynamics 365, read this.
Validate the relevancy of your fields in a Dynamics 365 form
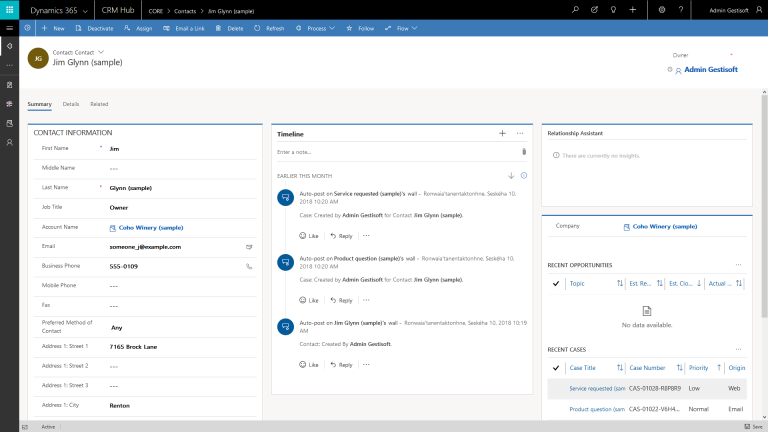
So, as I said earlier, the field with the fax number might not be as useful as it was 5 or 6 years ago and could probably be replaced by a field that better represents the business today’s business reality. For example, a field for the LinkedIn account of the contact could be useful.

To validate their relevancy, you need to ask the following questions:
- What information do we want to gather?
- What’s the purpose of having this information?
- Will the information help improve business relationships?
- Is it possible to get this information?
In short, from a productivity and Dynamics 365 CRM adoption perspective, it’s important to analyze the relevancy of the fields that we find in your different forms. The fields that are never filled from one record to another are like little intruders in your forms. Don’t hesitate to remove them and simplify your forms.
To see how to create or modify a form, refer to this blog here.
Create or recycle a field with Dynamics 365, is it possible?
I know that you are anxious to customize your first field, and put your creativity to work and invest yourself in creating better forms with better fields. But, you have to be careful before throwing yourself into the creation of those fields. You first need to ask yourself the following question: does a form or a system field that would meet my needs already exist?

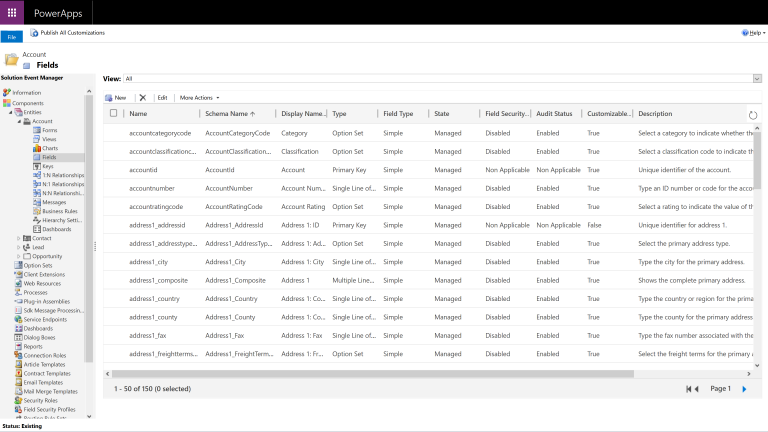
In fact, using the system field could allow you to save precious time in creation. So, take the time to look at the existing fields. And don’t worry, I’ll show you how to access the existing system fields that we find inside Dynamics 365.
Create and insert your fields in a form using the solution
As mentioned in the blog ‘’How to create a solution with Microsoft Dynamics 365,’’ if you create fields from the solution, that’ll allow you to easily find your customizations. For those that are asking, “what’s a solution?” we can compare it to a bucket that we fill with customizations, which are the content. These fields are part of a type of content that we can find in a solution.
What types of fields we can create with Dynamics 365?
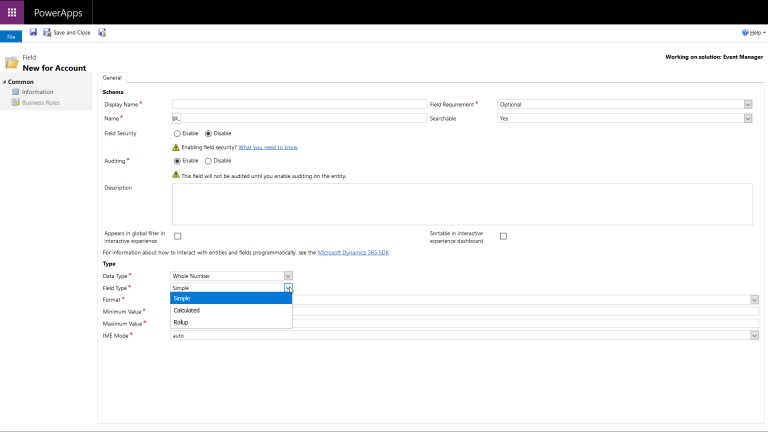
Dynamics 365 offers us the possibility to create three different types of fields according to our needs or the type of data that we want to cumulate or show. Here’s a list of those fields with a short description of their ability:
- Simple field: Contains data that aren’t based on a formula;
- Calculated field: Contains calculations that use fields of the actual entity or parent entity that are connected;
- Cumulated field: Contains a global value calculated from the record associated with a record, or a calculated value through hierarchy.
What type of data can we associate with other types of fields with Microsoft Dynamics 365?
Dynamics 365 gives you the ability to create three different types of fields depending on the need and type of data you want to accumulate or demonstrate. Here is a list of these fields with a brief description of their potential.

One line of text: This field can include up to 4 000 characters of text. Be aware that you can set a smaller limit. This field offers many format options that modify the text presentation. These options are email address, text, Text Zone, URL, Action symbol and Phone.
Many lines of text: This field can include up to 1 048 576 characters of text. You can also set a smaller limit. When you add this field to a form, you can specify the length of the field.
Option group: This field offers a set of options. Each option contains a value in the form of a number or a tag. Once added to a form, this field displays a control option, so users can select only one option. When this field is displayed in the ‘’Advanced Research,’’ users can also use a control in the drop list, so they can select many options to include in their research criteria. You can define a unique group of general options and set up fields with Option Group of multiple selection to use this unique option group.
Option group of multiple selection: This field offers a set of options where it’s possible to choose many of them at the same time. Once added to the form, this field uses a control to enable users to choose many options. When this field is displayed in ‘’Advanced Research,’’ users can choose many options from the list to include them in the research criteria.
You can define a group of unique general options and set up fields for Option group of multiple selection to use this group of unique options.
Two options: This field offers two options. Each option includes a value in the form of a number, either 0 or 1 corresponding to a ‘’true’’ or ‘’false’’ value. Each option has also a tag so the value ‘’true’’ or ‘’false’’ can be represented by ‘’yes’’ or ‘’no,’’ ‘’very interested’’ and ‘’less interested,’’ ‘’open’’ and ‘’close,’’ or any other pair of tags that you want to display.
The two-option field doesn’t offer options for formatting the field, but when you add them to the form, you can choose to display it in the form of a radio button, check box or selection list.
Status: System field including options that correspond generally to an active or inactive state. Some attributes of the system have supplementary options. But all the customized attributes have only the option of status ‘’Active’’ and ‘’Inactive.’’
You can also include customized state of transition to control the available options for status for certain entities.
Reason of the status: This system of field includes options that provide additional information of the field Status. Each option is associated with one of the available options for Status. You can add and modify options.
Entire number: An entire number with a value between – 2 147 483 648 and 2 147 483 647 can be entered in this field. You can limit the maximum or minimum values in this space. The format options ‘’None,’’ ‘’Duration,’’ ‘’Time Zone,’’ ‘’Schedule,’’ and ‘’Language’’ in this field change according to their presentation.
Number with floating point: It’s possible to use a precise number with up to 5 digits after the point for the values between – 100 000 000 000 and -100 000 000 000 in this field. You can specify the precision level and the maximum and minimum values.
Decimal value: It’s possible to use precision up to 10 digits after the point for the values between – 100 000 000 000 and -100 000 000 000 in this field. You can specify the precision level and the maximum and minimum values.
Currencies: Monetary values between -922 337 203 685 477 and 922 337 203 685 477 can be entered in this field. You can define the precision level or choose to base the precision on the specific currency or a unique standard of precision used by the organization.
Date and time: This field includes format options allowing to display ‘’Date’’ only or ‘’Date and Time.’’
Image: Each entity that controls images can include an image field. When an entity has an image field, it can be set up to display the image to save in the app.
Search: This field allows you to define a reference to a unique way of saving a specific type of entity. These system search fields can behave differently.
Proprietor: This system field refers to the user or the team who is attributed to an entity saving belonging to a user or team.
Unique identifier: This system field saves a global unique identifier (GUID) value for each saving.
Client: This search field can be used to specify a client that can be an account or a contact.
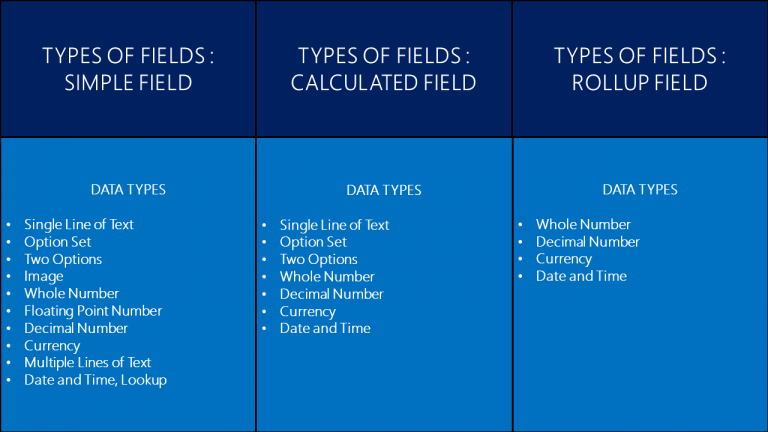
Here is a table that illustrates the type of data that can be added to different types of fields.

In conclusion, you now know which questions to ask to better identify the relevancy of fields that you find in forms. Additionally, now you know how to distinguish which type of fields goes with which type of data.
In the next blog, we will show you the practical side of integrating fields in your different forms.
For all other questions related to CRM, we encourage you to contact us. It'll be our pleasure to help!
Liked what you just read? Sharing is caring.

August 28, 2018 by Frédéric Charest by Frédéric Charest VP of Marketing
Data-driven Growth Marketer with a Passion for SEO - Driving Results through Analytics and Optimization


