There are many reasons to put a G/L account in place. Whether you are looking to redefine how you publish data or you need to improve your accounting system by having many General Ledgers, you are at the right place.
Today, I will guide you throughout the creation of a new general ledger in a way that you will be able to reproduce those steps in your own Dynamics 365. It is fairly easy, but I will show you all the important functions.
How to create a G/L account in Dynamics 365
Before even talking about functions in your new G/L account and the numerous benefits for you, you need to know how to create it. Ready to start?
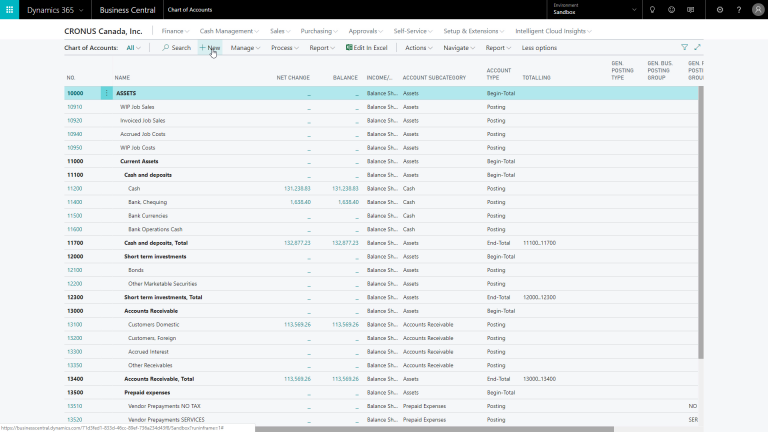
First, you need to click on Finance & Chart of Accounts or use the Search function to find Chart of Accounts. You will then see several Charts of Accounts, Balance sheets and so on.
To create a new G/L account, you will need to click on New in the top menu. At this point, you will need to enter a number. Careful, the number needs to be unique so, for this case, let’s enter 8450.
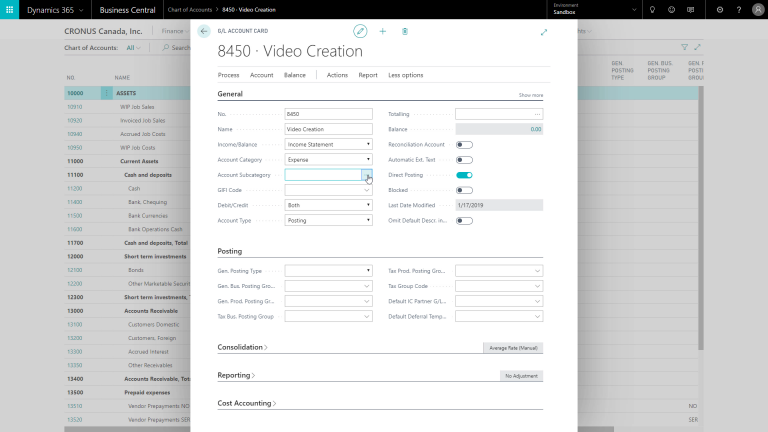
For the purpose of this blog, I will create a G/L account for Video Creation. Then you will be able to select if it is an Income Statement or a Balance Sheet. Why does it matter? Because the system will use this field when closing the income statement at the end of the fiscal year. In this case, let’s say that it is an Income Statement account.
After that you can select an Account Category or Subcategory. Even though these fields are not mandatory, I would advise you to use them because it will enable you to use various financial reports.
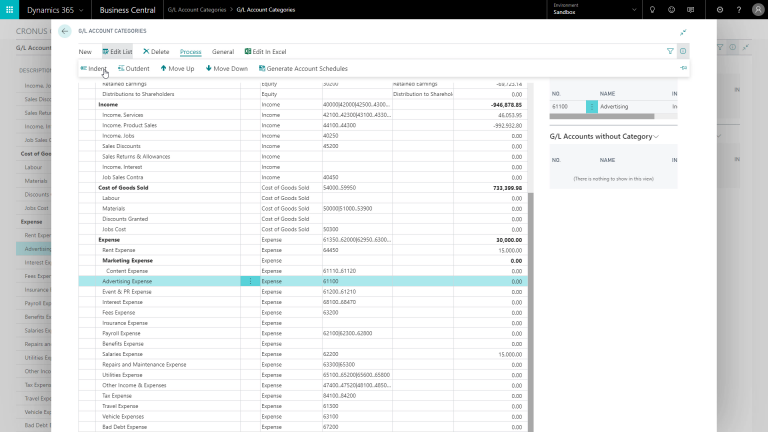
You can select one of the predefined categories. For this situation, let’s select an Expense account.
Finally, you can see several examples created by default in our demo account. In this one, we will use Advertising Expense. As you can see, you have the possibility to choose if it is a debit or credit account, then you can select the account type. It is important to know that with the account type, you can structure your Chart of Accounts.
How to get the most out of your G/L account with a customizable structure
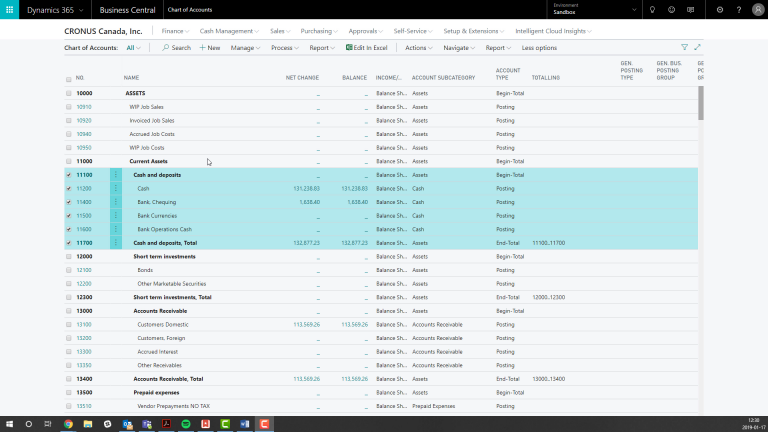
To demonstrate the power of Dynamics 365, let’s go back to the Chart of Accounts. You can see the different accounts and by assigning the account type, you can create the structure to your Chart of Accounts.
You will also see begin total, end total, and total. Now, if you use begin total and total, you can use the function Indent Chart of Accounts, and then the system will automatically indent all the lines between a begin total and an end total. Easy, isn’t it? Indenting these accounts gives you a specific structure, which makes the Chart of Accounts easier to use.
I have to add here that the Indent Chart of Accounts function also automatically creates the totaling formulas. That’s, again, very interesting to use. As you can see from what I have shown you already, creating a new G/L account is a quick and easy way to make your work life simpler.
The different aspects of our new G/L account
To better understand the different functions of our new G/L account, we will look at a couple of important points and options that will allow you to customize this account and adapt it to your reality.
Here we go with the maintenance products.
First, an account that I would like to post to is called a posting account. Totaling is not necessary here because totaling is only necessary when the account type is total or end total.
Then, there is reconciliation account. What is a reconciliation account? It is an account that is retrieved in the report that you can run from the General Journal, and it will give you an overview of the balance of an account that you would have before and after posting.
Also, we have to talk about direct posting because it is a very important field. It is used to enable or disable posting directly to the account. How? So, there are G/L accounts that you assign to posting groups like the receivables account, the payables account, and so on, and you would clear the field. In short, direct posting is not allowed there because of the choice you made. You can only post through a posting group.
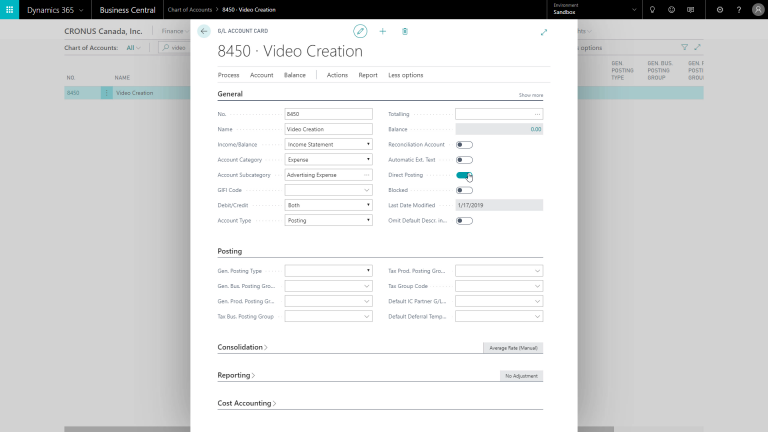
There is also the function Blocked that doesn’t need a lot of explanations. Here I can also select to omit the default descriptions in journals.
And then we can go to the next Tab, which is the posting Tab. This tab is also very important because it can enable that calculation for a G/L account.
Then there’s a general business posting group where I can select one of the existing posting groups.
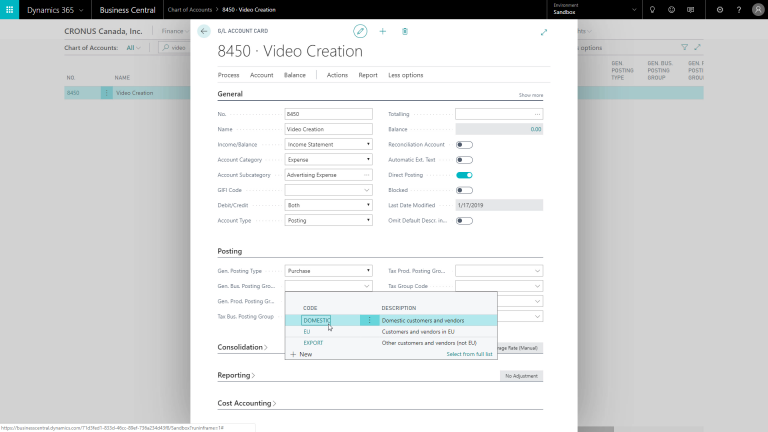
Now, it can be complicated, but in short, the general business posting group with the VAT business posting group can be overruled by the business posting groups that are assigned to customers and vendors. So, these will only be used in certain parts, like journals, where you don’t use a customer or a vendor. Incidentally, it also means you don’t have to enter the business posting group and the VAT business posting group, but it’s not a problem if you do. Simple and easy-to-use, is the true Dynamics 365 way.
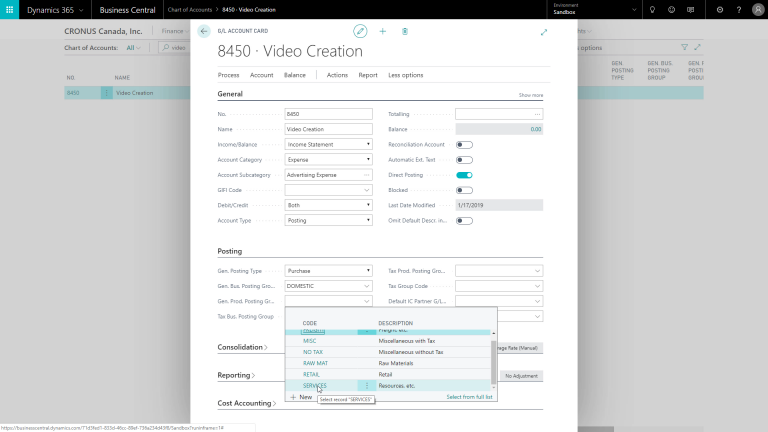
We can also talk about the product posting groups, that are really important for your operations. Trust me, you are going to rely a lot on them. At this point, it is interesting to note that by entering the general product posting group, the system also entered the VAT product posting group.
Finally, this is very important. I know I say that a lot, but for me, this is actually the most important field: the FastTab. If you have to enter the FastTab to enable VAT calculation, this is a very important field because, with this we will define the VAT rate.
And after that, there’s the default intercompany G/L account number. This is used in an intercompany setup to map a G/L account to the intercompany Chart of Accounts. For example, I could enter the G/L account here, in which case we post Maintenance Products, and then in the intercompany Chart of Accounts.
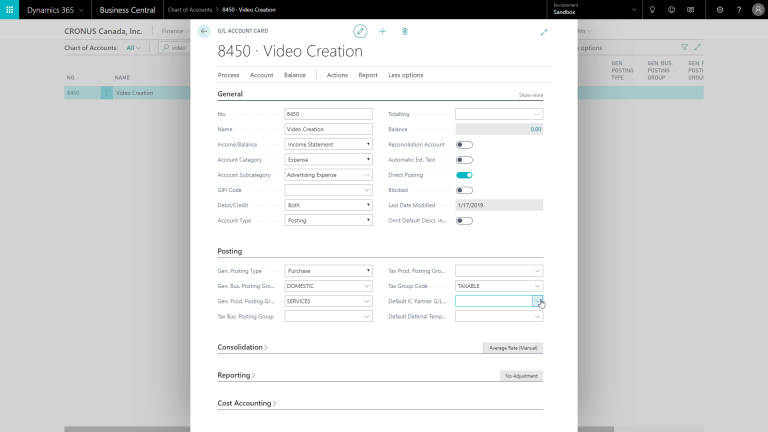
In short, I just want to take a brief moment to talk about the default deferral template. Once again, the deferral template is a very interesting concept that I will explain in the module on general journals. However, just so you know, if you’re setting up a consolidation, similar to the default intercompany partner account, you can map these G/L accounts to the G/L accounts in your consolidation company.
For example, if you’re using a consolidation, you are also creating a consolidation company with a Chart of Accounts, and here we can map G/L accounts to accounts in the consolidation company Chart of Accounts. Amazing, am I right?
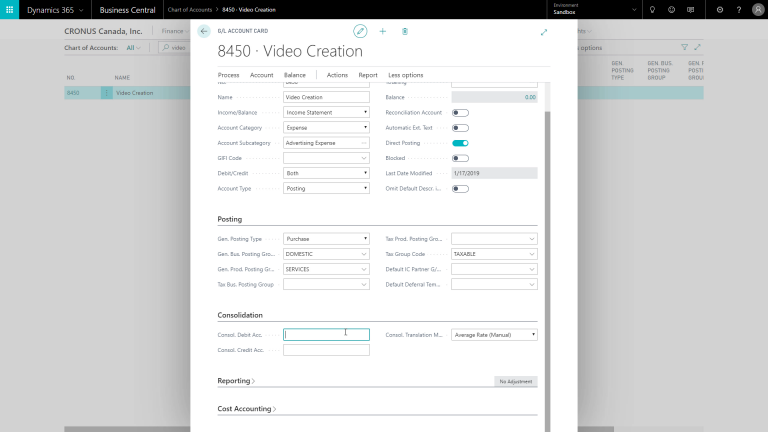
And there’s also a consolidation translation method that you might have to use when you’re consolidating between different currencies.
We are almost done, but I want to talk about reporting for a moment. In reporting, I can specify how I would like the system to calculate exchange rate adjustments for the additional reporting currency. This can help you be more accurate while avoiding the workload that comes with that kind of calculation.
And then finally, there is cost accounting. If we are using cost accounting, you can see the linked cost type. You can add, change, or delete G/L accounts. However, to prevent discrepancies, you can’t delete a G/L account if its data is used in the Chart of Accounts. Which can avoid a lot of bad mistakes or headaches, am I right?
As you can see, there is a lot of value in creating a new G/L account. Whether it is to get a more customized account better suited to your needs or simply for a peace of mind style of management, you are covered with a G/L account. I hope this helped you understand the ins and outs of creating a new G/L account. Stay tuned to learn more about the sub categories.
Liked what you just read? Sharing is caring.

November 14, 2019 by Frédéric Charest by Frédéric Charest VP of Marketing
Data-driven Growth Marketer with a Passion for SEO - Driving Results through Analytics and Optimization


